|
Monday, August 14, 2006
the ambigram tutorial part 2
Long overdue. But hey, better late than never. Now, coming off from perfecting the first letter (which will be the last letter upon inversion), let us now proceed with the rest of the name. Depending on the name, you may need to work on letters two at a time. And this will require a lot of speculation and imagination as to its upside-down-ness. I suggest having a scratch pad beside you where you can scribble and draw. At least it will be easier to twist around vs. your monitor. So, let's move on shall we?
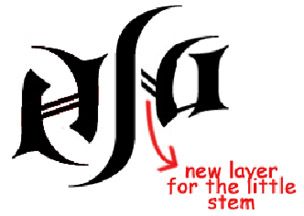
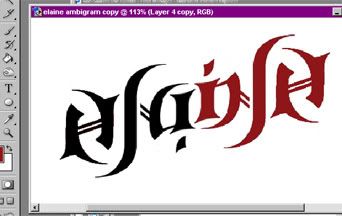
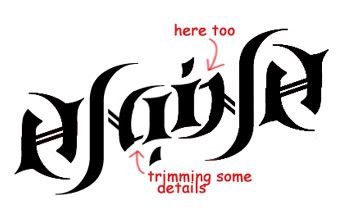
Step five. Now duplicate the next letter and bring it down beside your E. Here I've brought down two - the L and the A. Always have them on separate layers, so it would be easier to manipulate them (use the Layer via Cut selection on your polygonal lasso tool). Thinking about how it would look upside-down, these letters must also take the form of an I and an N when inverted. Study how you can make an N out of the lines you currently have. A capital N can be made out of the L and the A's curve. Can you see it?  To connect this and make it appear like the letter I want, I need to bring in a line that satisfies the purpose without looking too obtrusive. I then copy (Layer via Cut) how the stem is on the letter E and manipulate it to "connect" my A to the L. Now there's my N.  Step six. Next is the A that should be an I when inverted. This is fairly easy as the A already has a base for the small "i". I copy how the dot is rendered from the original "i" and drag that new layer onto the A's base. Tada! Once you get on a roll, it doesn't seem that hard anymore eh?  Step seven. We're almost done! Since you've already gotten the first 3 or 4 letters down, you can just merge all these layers and invert it. Why? Because in effect, you've also gotten the last letters done as well. Yehey! If you're all happy with how your first letters (above) are, just link all their layers and click Ctr+E. Right click this merged layer and select "Duplicate Layer". You may now invert this entire new layer, as I have done below.  Step eight. Everything is coming together now, isn't it? You may want to leave it as is, since it is already quite readable both ways. But if you're OC like me, you'd want to make some more trimmings. I note that the A and the I can be confusing, especially with the stem coming off to form the N. So I decide to trim some details to make the letters more distinguishable from each other, but still collectively look like the name.  Step nine. I'm very happy with how the name turned out. You may want to do some final nudging and positioning to get it perfectly the way you want it. Now for more touches of antiquity, add some fleur-inspired dingbats to complete the look. Just duplicate and invert them, then position them on the corners to frame your masterpiece.  And well, there you have it, a finished ambigram. Have yourself a happy photoshop therapy session. 6 Comments: |
 strapped in @


hehehe...lalong sinisipag sa photoshop kasi may bo na...hehehe...
ang galing!